The Excel Fill Handle: How to Quickly Add Data

The Excel fill handle is one of the most convenient tools available to enter data quickly and easily. Using the fill handle, you can enter repeating or sequential content across multiple cells at a time.
This quick guide will provide you with how to use the fill handle to fill in data on your spreadsheet.
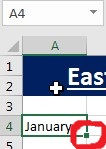
First, you need to know where and how to start with the Excel fill handle. On the bottom right corner of any Excel cell, you will see a large square:
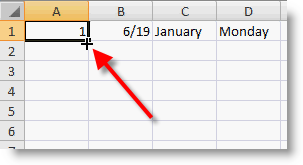
When you hover your cursor right over that square, the cursor changes into a bold + mark:
Once your cursor shows that icon, you can click and drag the cell horizontally or vertically to fill in the data. The content of the first cell will determine what will be filled in across the other cells.
Filling In Dates
You can start with a single date or month and use the Excel fill handle to fill in the remaining months:
Filling in Sequences
If you use several cells in a row with related data, you can highlight all the cells and use the Fill Handle on the remaining cell to fill in the sequence:
Copy and Paste:
If you have a single piece of content and need to copy across cells, then you would use the fill handle on the first cell and it will copy it across all cells:
As you can see, the Excel fill handle is an ideal tool to quickly fill in data.
We here at Learn Excel Now hope you enjoyed this week’s tips on the Excel Fill Handle. Hopefully this will save you some time as you build your spreadsheets.
Like Learn Excel Now? Subscribe above to receive our weekly tips and special offers.
Getting Social with Excel – Follow us on social media and share our content with your networks!
Kevin – Learn Excel Now


Responses